Advanced workshop
Architecting Angular Apps for High Performance
High-Speed Angular applications on any device
Learn more
Advanced workshop
High-Speed Angular applications on any device
Learn moreThis is the second post in a three-part series unveiling the secret capabilities of Zone-Flags and the hidden pitfalls of disabling Zone, configuring it statically, or migrating it. In the previous article, we discussed how Angular's change detection mechanism worked, and the last part of this series will go into more detail on the Zone-Flags debugging and risks related to configuring Zone over Zone-Flags.
Zone-Flags prove helpful indeed when it comes to configuring Zone. You can use them to substantially improve the performance of your Angular app and better orchestrate the change detection process.
So, let's get a first glance at what Zone-Flags are, what opportunities they offer, and what to expect configuring them in your project.
⚠️ Notice
Zone-Flags are a static way to partially disable zone.js.
This means configuration has to happen statically before zone.js is imported. We will discuss later in the article what consequences doing otherwise might have.
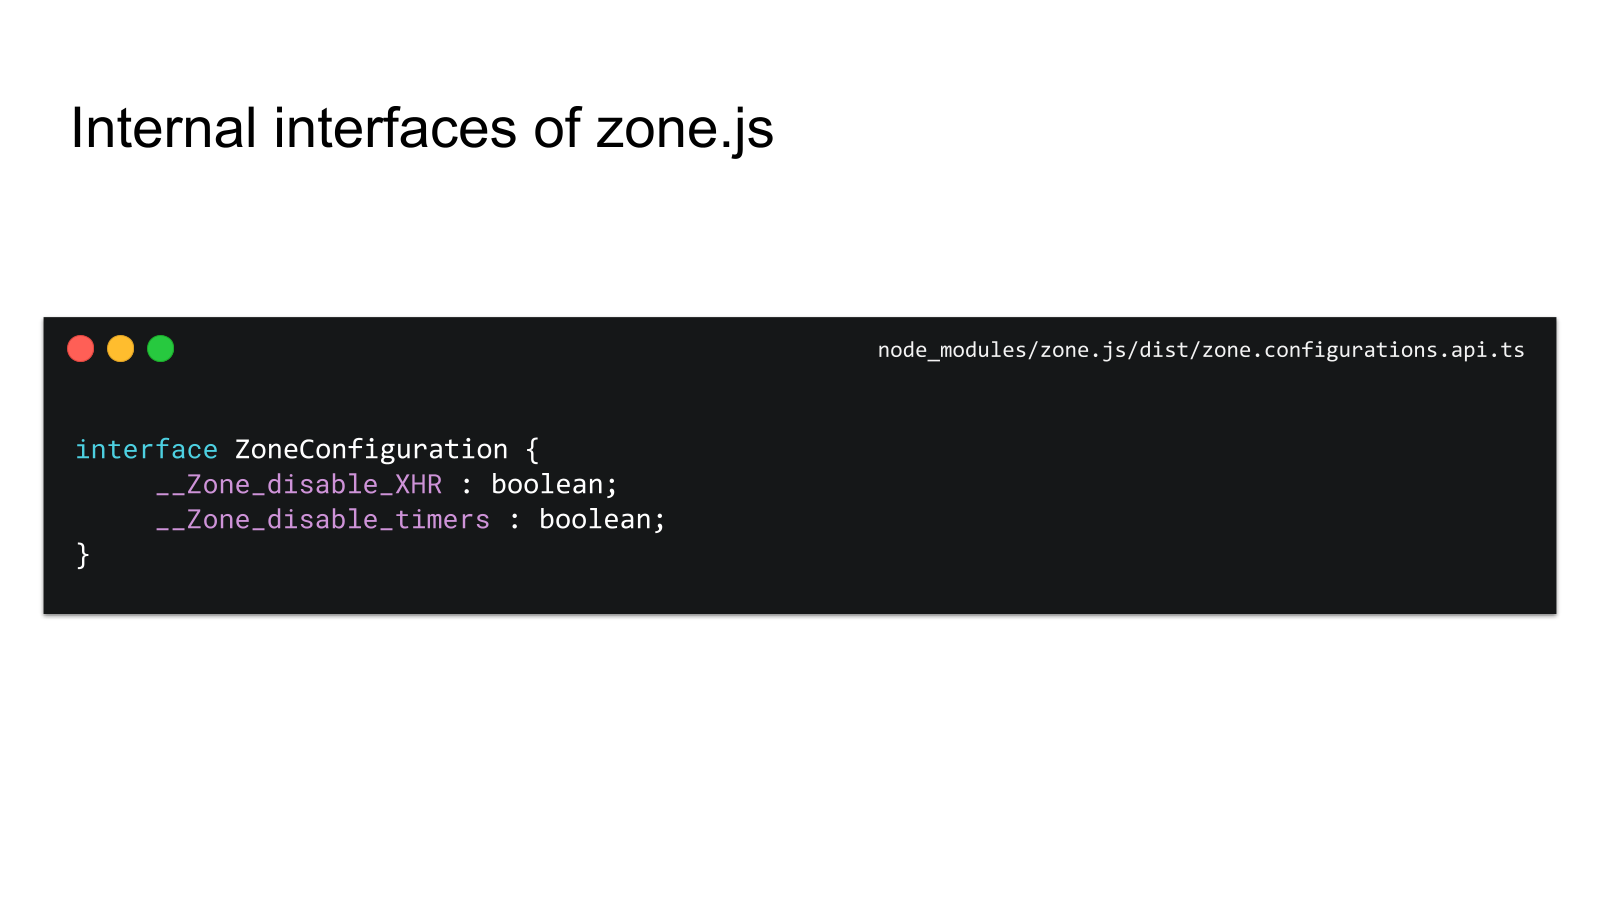
Zone-Flags are Symbols on the window object, so we can use the direct window properties to set them up. Accordingly, upon initialization, Zone starts looking for specific flags in the window object to see if certain APIs should be patched or not.
Besides the global window object, zone-flags
To use Zone-Flags, first, you should create a file in your src folder named zone-flags.ts
(window as any).__Zone_disable_requestAnimationFrame = true;
When zone.js is initialized on the page, it takes on the values of the flags that are already located in the windowzone-flags.tszone.jspolyfills.tszone-flags.ts
//            👇                     👇
import './zone-flags'; // Included before zone.js
import 'zone.js/dist/zone';
Then, you can easily test it and see what happens if flags are not imported. Start your Angular application with the flags file commented out and run a measurement:
//            👇                     👇
// import './zone-flags'; // Included before zone.js
import 'zone.js/dist/zone';
At this point, there are two more things that we need to keep in mind.
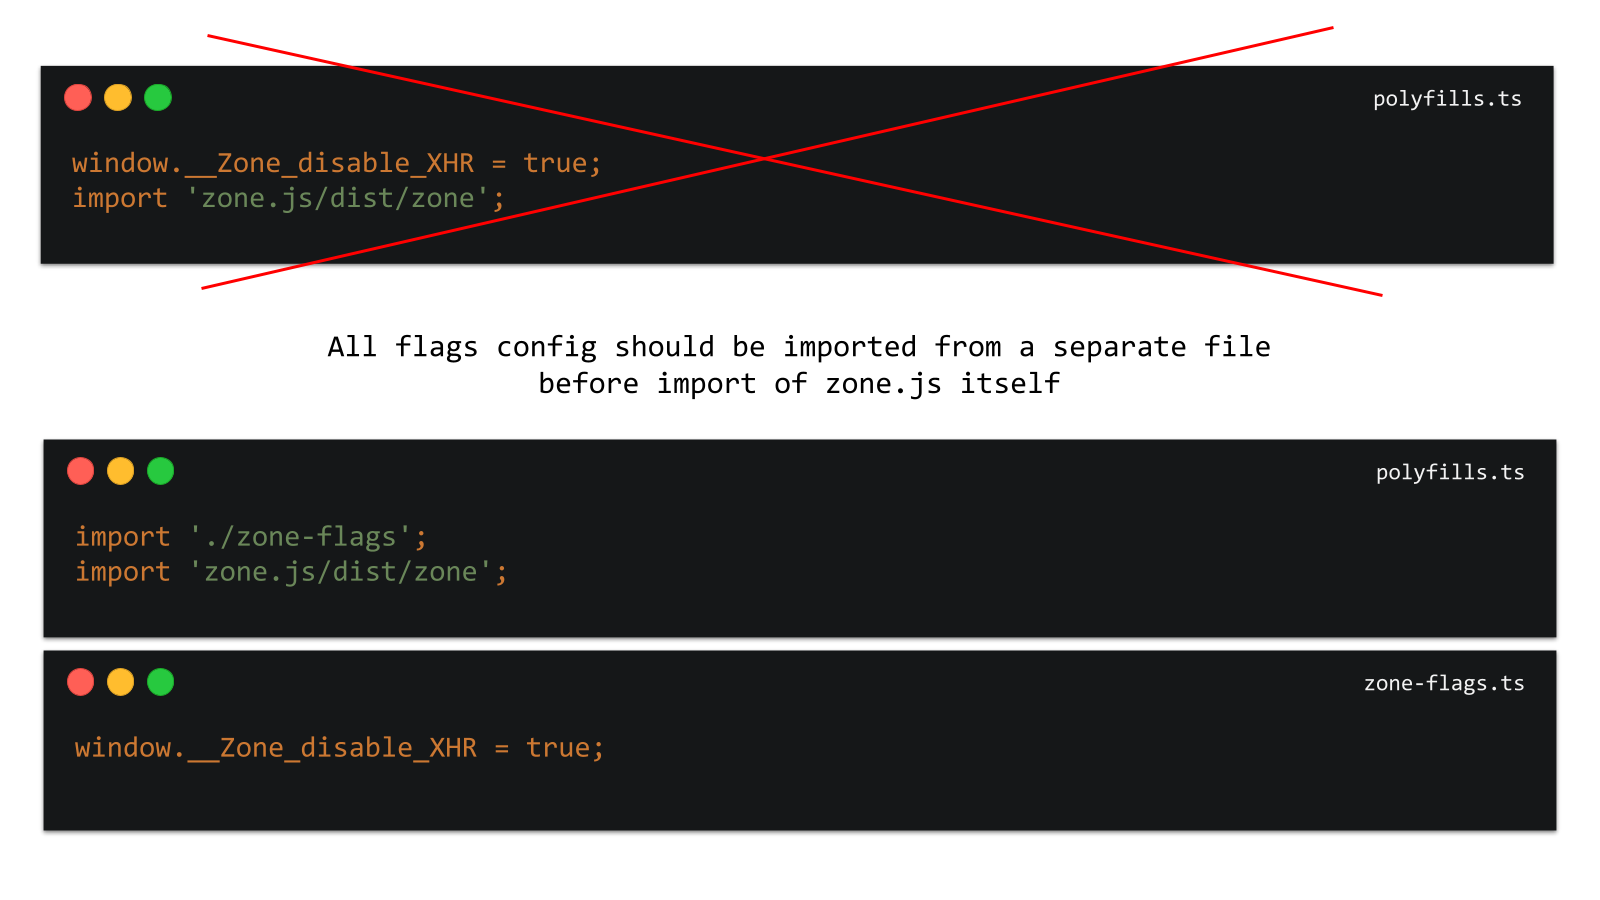
First, all flags’ configurations should be imported from a separate file (window as anyzone-flags.tszone-flagszone.jspolyfills.ts
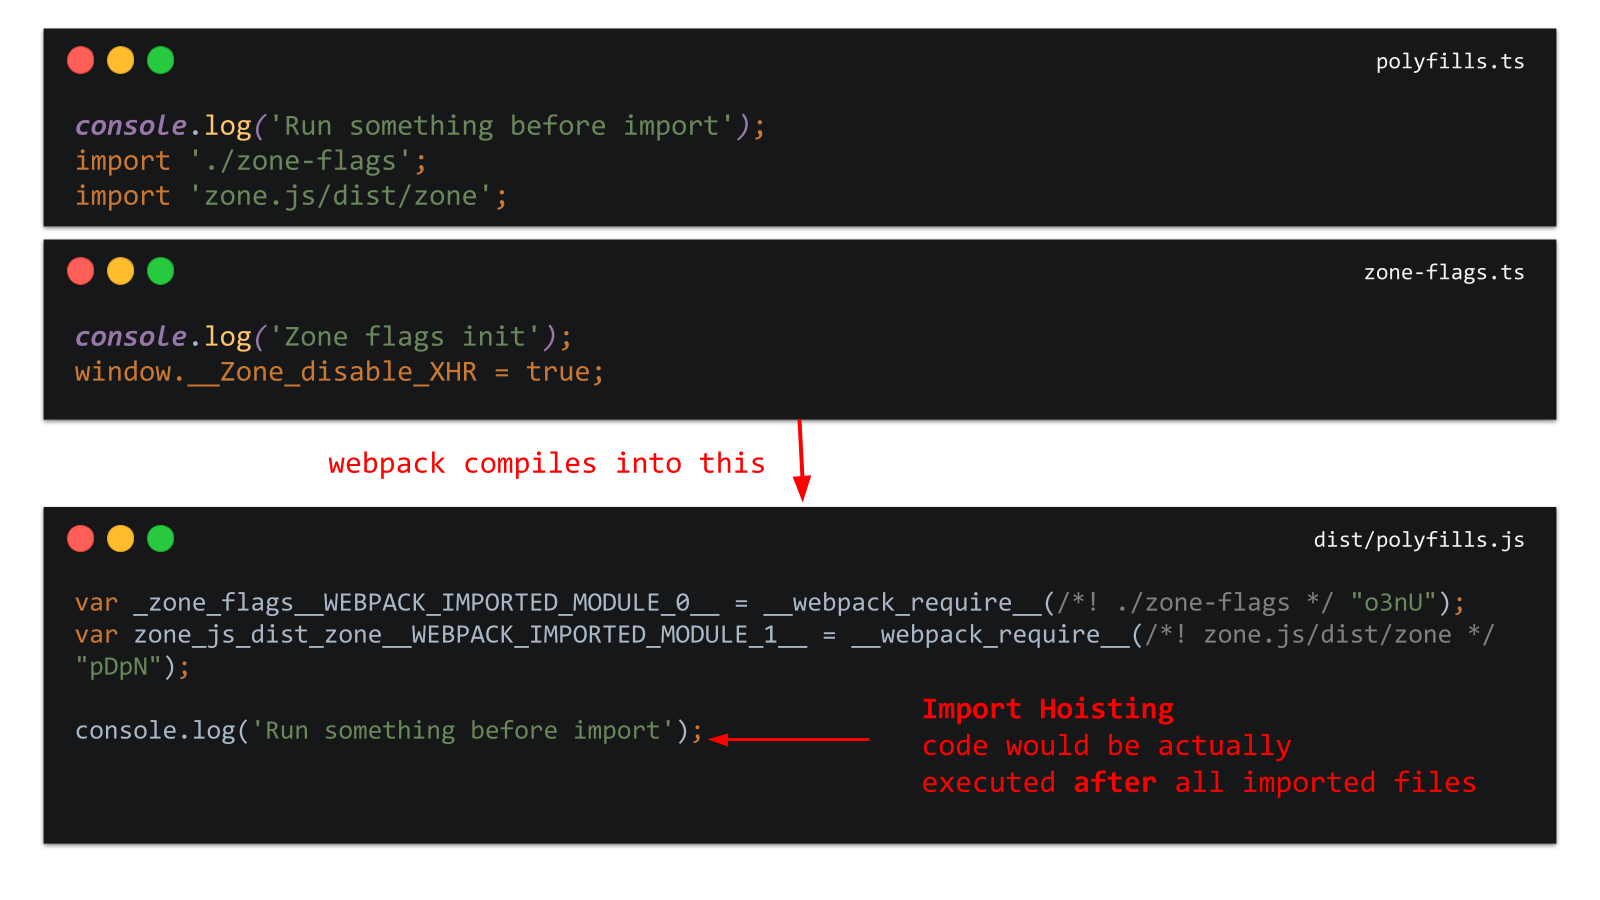
Second, files must be imported before any executable code. The reason behind it is that all imports normally get hoisted by webpack, and thus the imported code is injected into a bundle before any meaningful JS in the file. Here is an example of what happens if you neglect this rule.
The input:
console.log('Run something before import');
import './zone-flags'; // Included before zone.js
import 'zone.js/dist/zone';
console.log('Zone flags init');
window.__Zone_disable_XHR = true;
The output produced by webpack compilation:
var _zone_flags__WEBPACK_IMPORTED_MODULE_0__ =
__webpack_require__(/*! ./zone-flags */ "o3nU";

var zone_js_dist_zone__WEBPACK_IMPORTED_MODULE_1__ =
__webpack_require__(/*! ./zone.js/dist/zone */ "pDpN";
console.log('Run something before import');
It is inefficient to do so, and I cannot emphasize enough how important it is to learn to do things the right way.
We already know from the previous article that it is preferable to configure zone.js instead of fully disabling it. This way, you can gain more control over your app – which is especially important when the application is big and complex – but this will only work out if the configuration is applied gradually. This is where Zone-Flags should come into action.
The default approach allows setting up Zone-Flags in three steps.
1. First, you need to create zone-flags.tspolyfills.ts
2. Then, in your zone-flags.ts
(window as any).__Zone_disable_requestAnimationFrame = true;
(window as any).__Zone_disable_timers = true;
(window as any).__zone_symbol__UNPATCHED_EVENTS = [
  'load',
  'error',
  'close',
  'open',
];
(window as any).__Zone_disable_XHR = true;
3. Finally, import zone-flags.ts above the zone in polyfills.ts
// 👇 Make sure zone-flags are imported before zone.js.
import './zone-flags';
// Zone JS is required by default for Angular itself.
import 'zone.js/dist/zone';
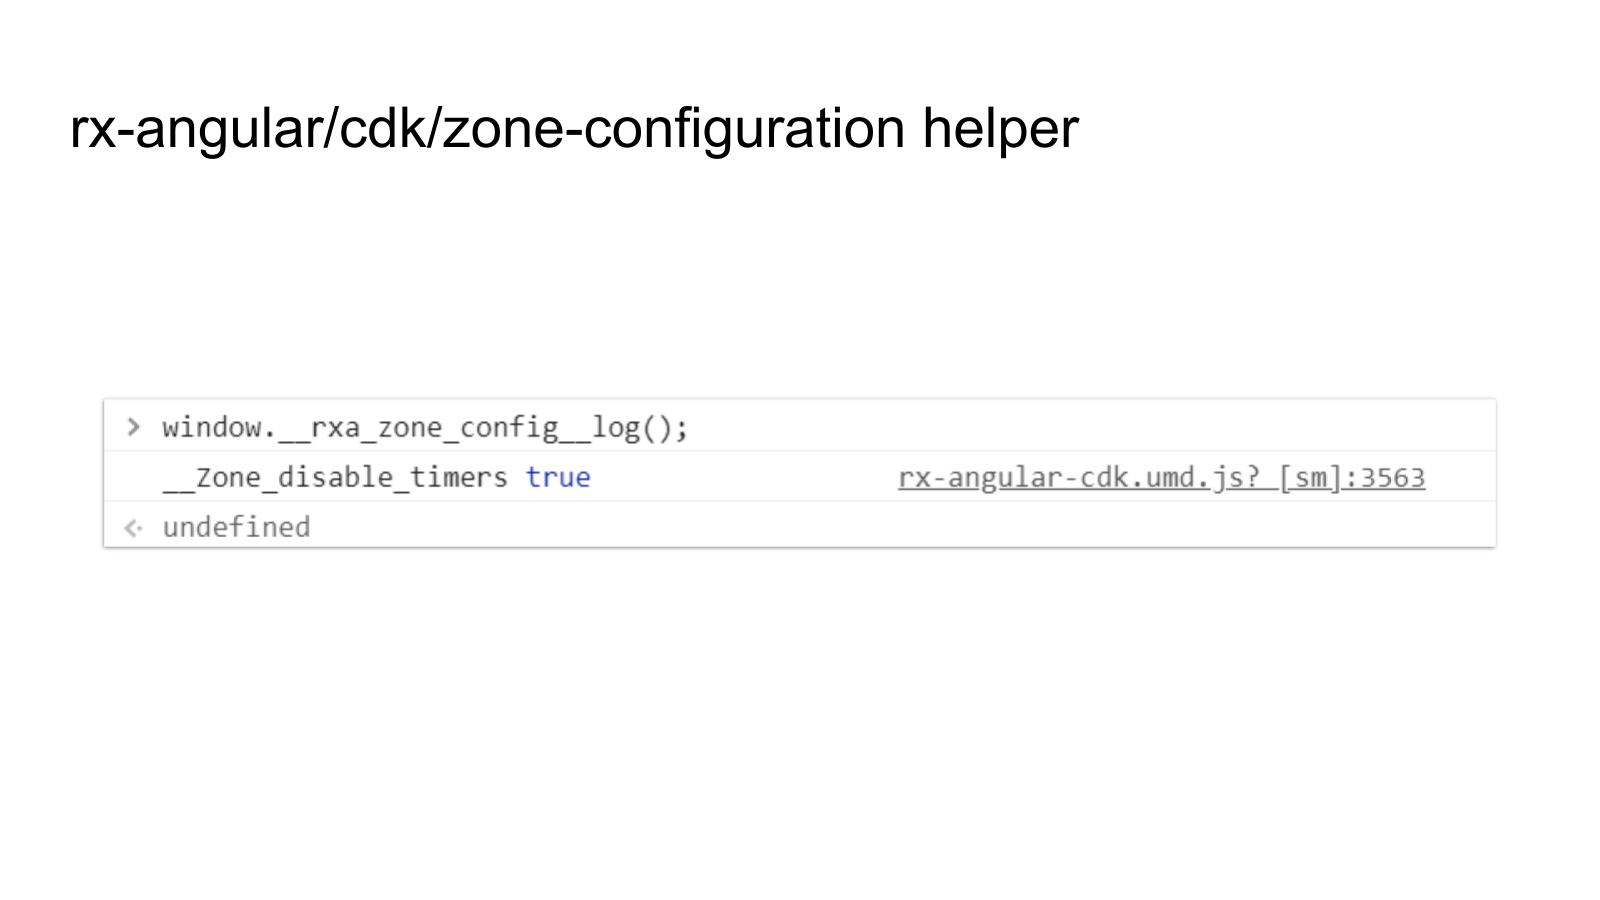
This way of setting up zone-flags
With RxAngular helpers in place, it is easier and more convenient to set up zone-flags
Comprehensive and well-maintained documentation
Typed methods
Autocompletion
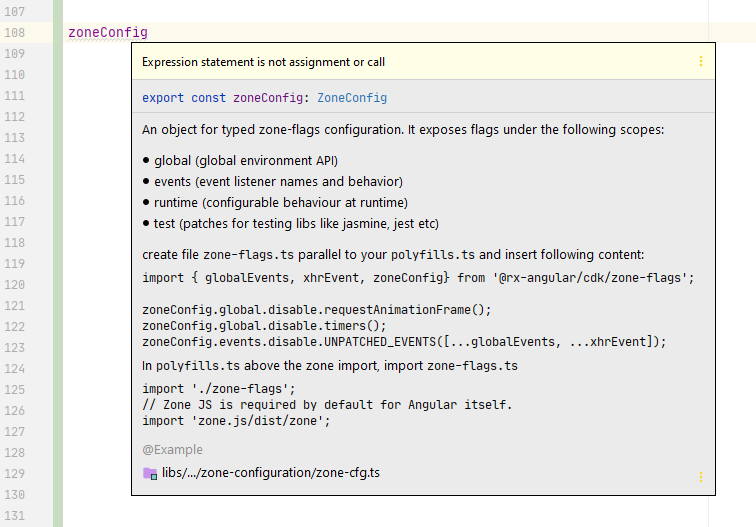
Inline documentation
Predefined event names
Convenience methods
Assertions for checking if zone-flags are correctly used
Keeping them in mind, let’s see how zone-flags
The first and last steps in the setup process will basically be the same. You begin your zone-flagszone-flags.tspolyfills.tszone-flags.tspolyfills.ts
That said, the big change that makes all the difference here is the content you insert into your zone-flags.ts
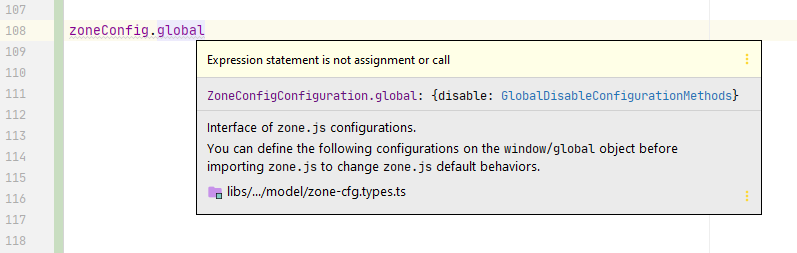
import { zoneConfig } from '@rx-angular/cdk/zone-flags';
zoneConfig.global.disable.requestAnimationFrame();
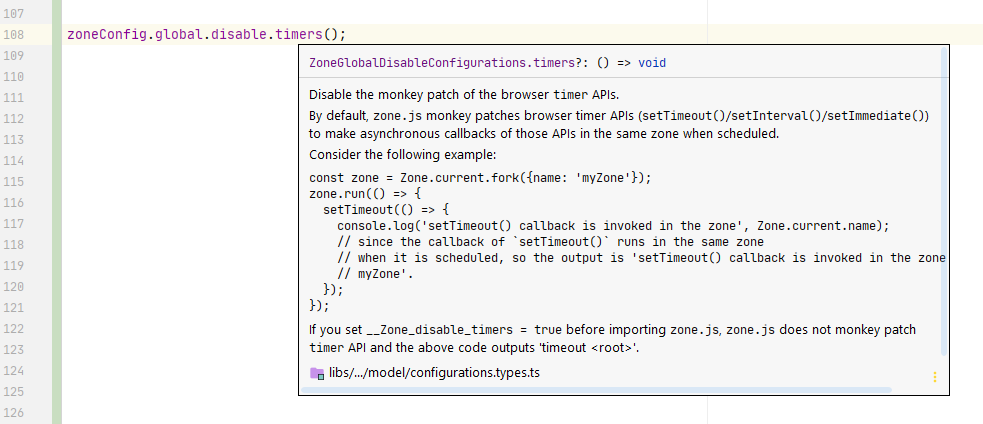
zoneConfig.global.disable.timers();
zoneConfig.events.disable.UNPATCHED_EVENTS([
'load',
'error',
'close',
'open',
]);
zoneConfig.events.disableXHR();
In this file, we are disabling some global APIs and several DOM events by adding typed and extra convenience methods.
As you type, you will see zoneConfig
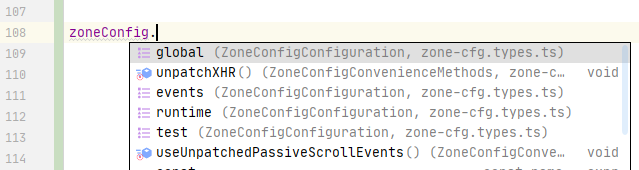
Every API has a speaking name chained with dot-notation to specify its type – e.g., Disable or Unpatched events:

As I previously pointed out, autocompletion is one of the perks you can expect when setting up zone-flags
After Zone-Flags are set up, their default runtime configuration can also be changed. First, you need to create a zone-runtime.tspolyfills.ts
import { zoneConfig } from '@rx-angular/cdk/zone-flags';
zoneConfig.runtime.disable.ignoreConsoleErrorUncaughtError();
Then, open your polyfills.ts
// Zone JS is required by default for Angular itself.
import 'zone.js/dist/zone';
// ☝️ Make sure zone-flags are imported before zone.js
import './zone-runtime';
⚠️ Notice
errors if it is used incorrectly. If you used zone-runtime configurations wrong (not executing it after zone.js runs) you should see the following error in the console: @rx-angular/cdk/zone-configuration
Now your zone-flags
As you’ve already seen, there are certain risks to be aware of when working with zone.js. Therefore, in the next article, we will find out how to mitigate them and effectively debug zone-flags
Intermediate workshop
Master Nx to enforce architecture, speed up your development workflow and improve code quality
Learn more
With so many moving parts involved in making Zone Flags work the way you need them to, troubleshooting is not easy. This article explains what problems to expect and which debugging strategies you should implement working with zone-flags.


PushBased's 2024 recap: 43 talks, NgGlühwein conference, RxAngular updates, and more. A year of growth, innovation, and community! Read our journey. 🚀

While it is quite well documented how to disable a zone completely, there is no information out there about fine-grained adoptions. Zone-Flags can come in handy when taking this approach and substantially improve the performance of your Angular app.

In this article we're taking a deep dive into optimizing Interaction to Next Paint (INP) with scheduling APIs. We will examine native solutions with their pros & cons and RxAngular's approach to performance optimizations.


The RxAngular team & community shipped great new features as well as quality of life improvements with the latest releases. In this blog post we'll dive into RxAngulars recently added new features, including the native support for signals.


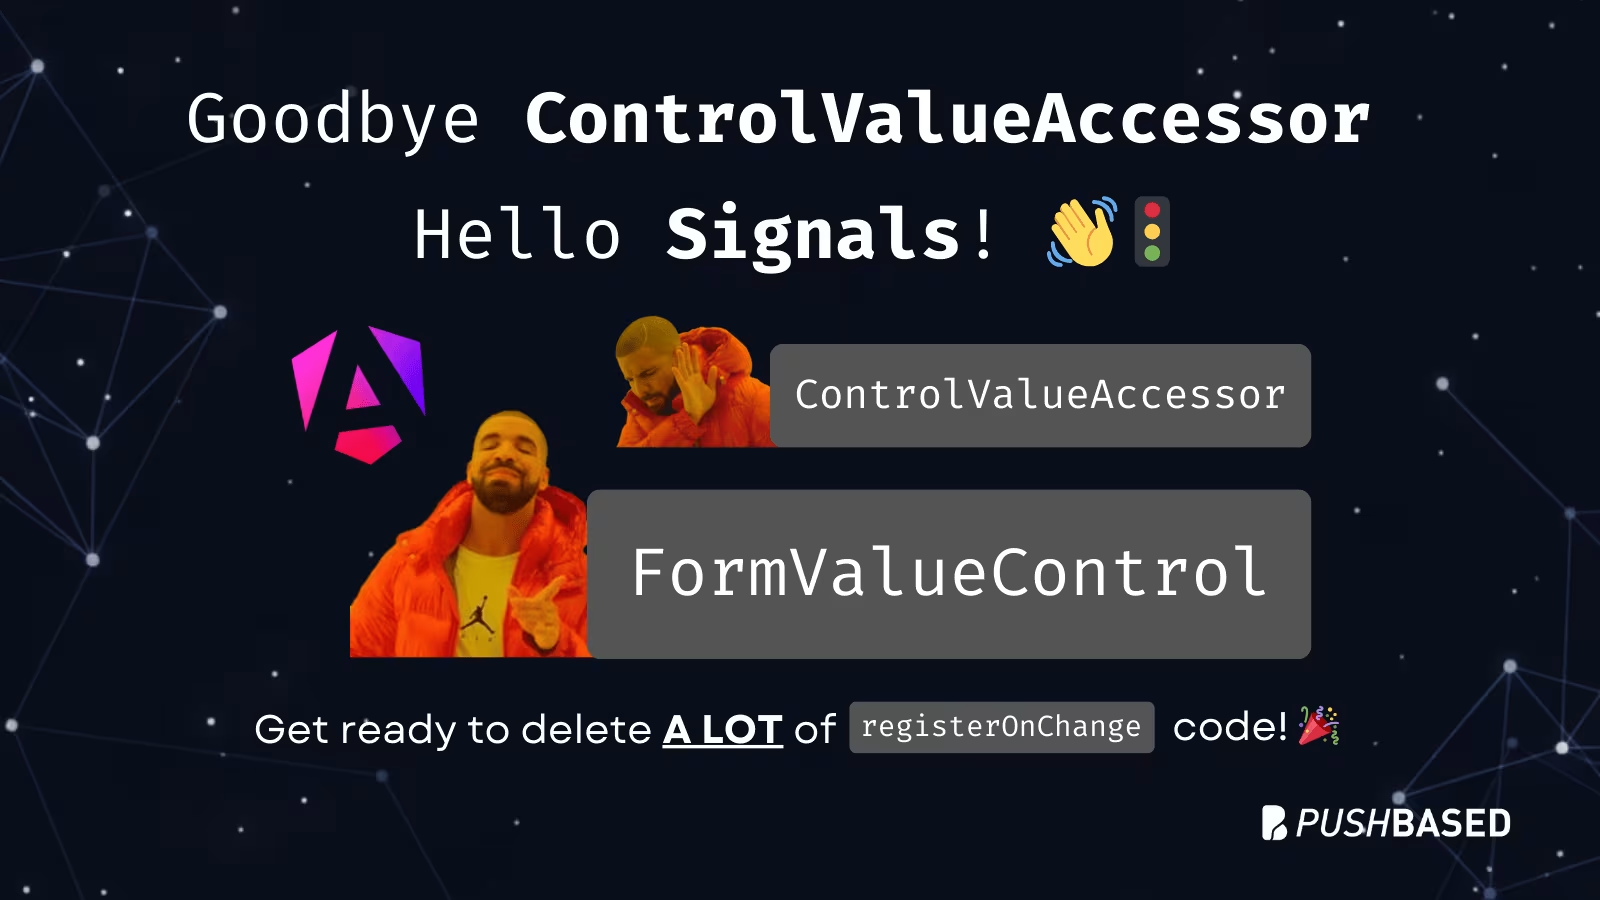
Angular is bridging the gap between the new Signal-Forms architecture and the Template/Reactive Forms. This isn't just a minor update—it’s a fundamental shift in how we author custom form controls.